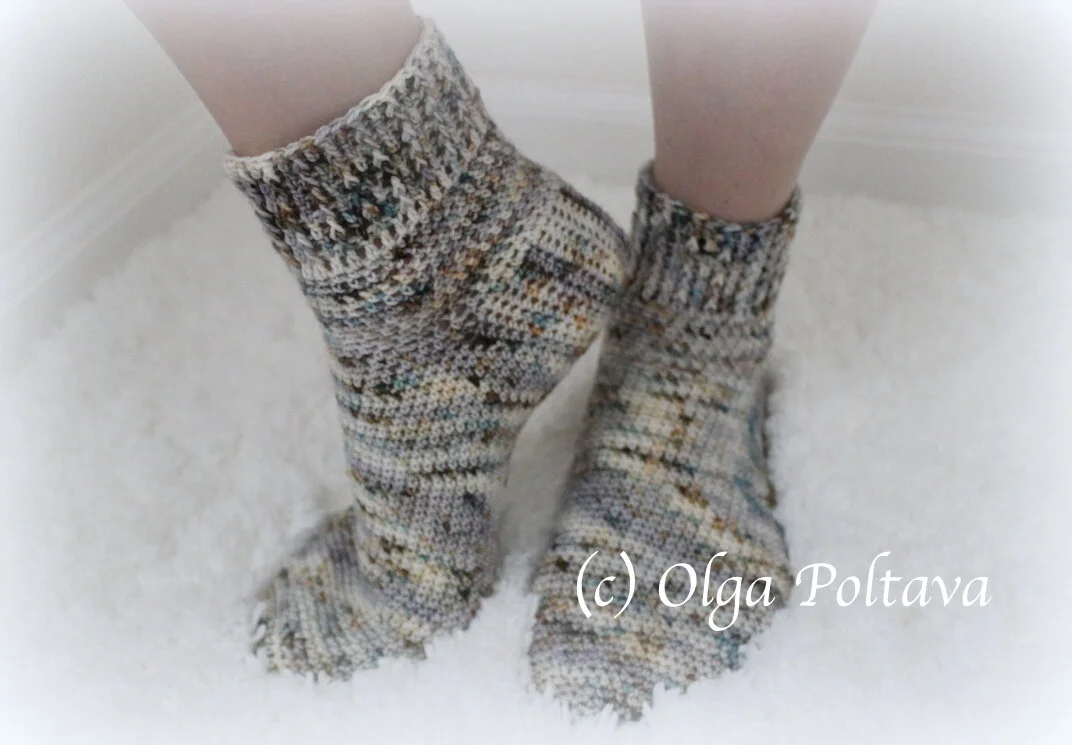
How to Crochet Simple Socks, Free Crochet Pattern and Video Tutorial
I don’t know why, but I always thought that socks are supposed to be knitted! As a crocheter of many years, I had believed that crochet socks are a big no-no! That was until I crocheted my first pair! They turned out great, but they weren’t really socks, more like warm and cozy sock-looking sleepers! But I was happy! I pushed myself out of my limited beliefs zone, and something cool came out of it!
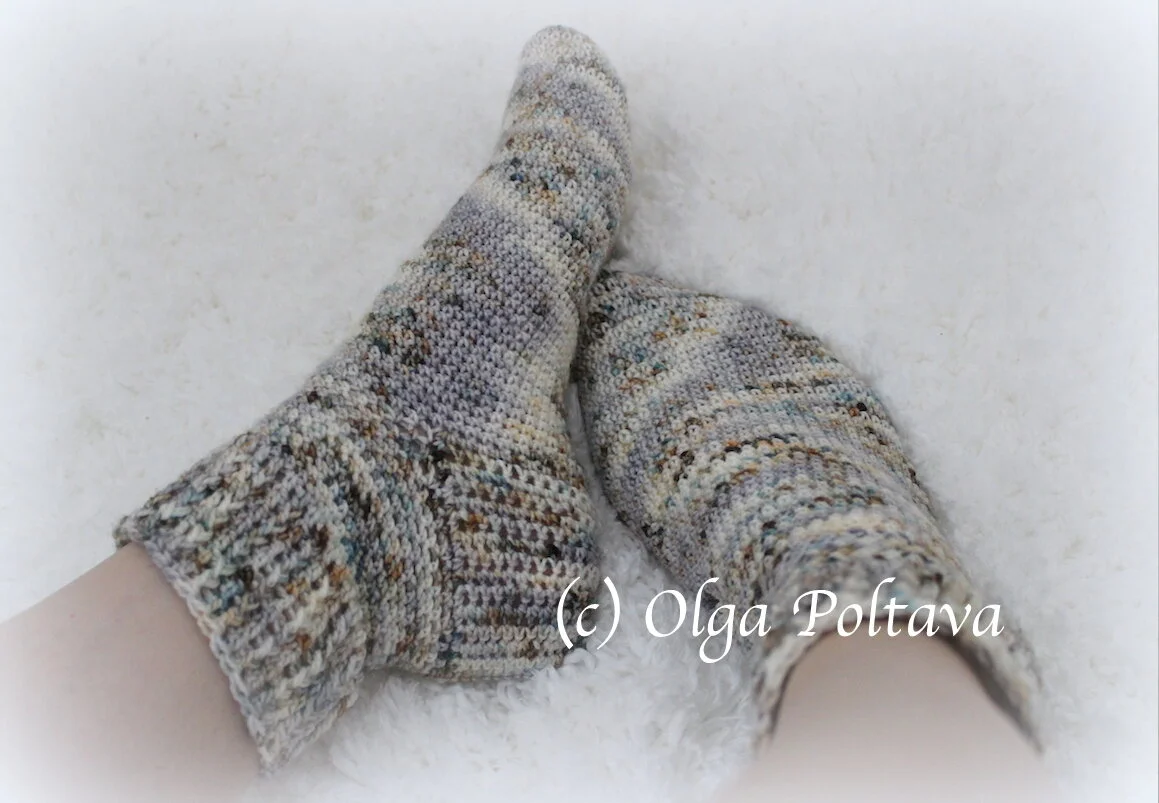
Then I made an even bolder move! I tried the sock yarn! The real, category 1, fingering, sock yarn that is used for knitting socks! And another pair of socks came out! A perfect fit, nice and cozy socks! They look just as good as knitted ones!
Well, I secretly believe they look even better, but I won’t push my beliefs onto you! Instead, I’m offering you my crochet socks pattern free, so you can give it a try and decide for yourself!
And not only the pattern, I also offer you a super detailed video tutorial as well!
I hope you enjoy it! Happy crocheting!
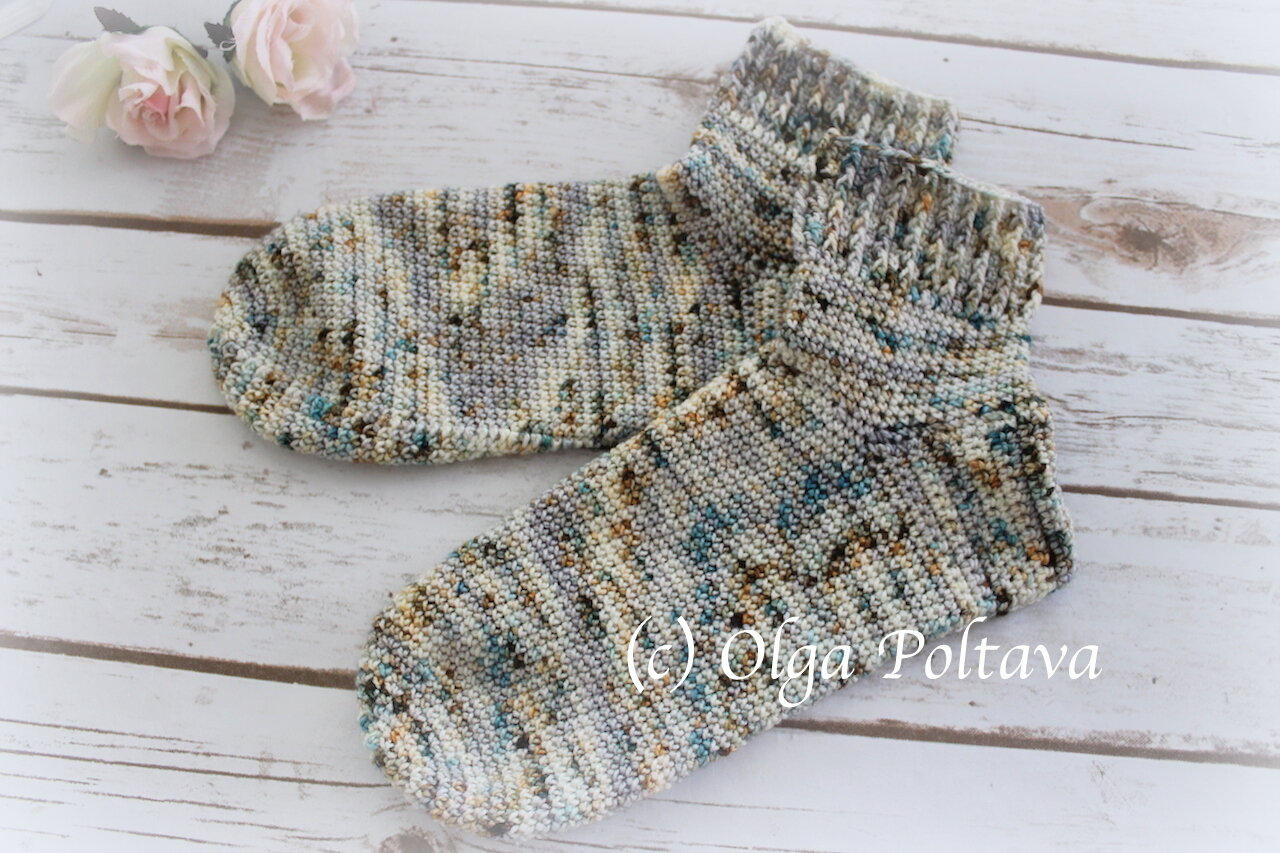
Olga’s Crochet Socks, Crochet Pattern
Olga Poltava © February, 2020
This pattern is my own design and it cannot be distributed in any form. You are welcome to make items for sale or personal use from this pattern.
This pattern is written using the US crochet terms.
Skill Level: Advanced Beginner
Sizes: women’s US shoes sizes 5-6, 7-8, 9-10
Materials:
US hook size E/4 (3.5 mm), D (3.25mm)
Fine socks yarn, 100% Superwash Merino Wool, about 400 yards (I used The Good Moss, colorway Snow in the Pines)
Abbreviations:
ch: chain
sl st: slip stitch
st: stitch
sc: single crochet
sc2-tog: two single crochets finished together (decrease)
dc: double crochet
FPdc: front post double crochet
** instructions between asterisks should be repeated as many times as there are stitches to accommodate them.
Magic ring.
Round 1: ch 1, 6 sc in ring; join with sl st to 1st sc. (6 sc)
Round 2: ch 1, here and in the following rounds, start each round working in next stitch (not into the stitch where joining was made, but into the next one) and grabbing yarn with hook over (not yarn over the hook as usual, but hook over the yarn) *2 sc in each sc* around, here and in the following rounds, make sure you finish into the stitch were joining of the previous round was made; join with regular sl st to 1st sc. (12 sc)
Round 3: ch 1, sc in each sc around; join. (12 sc)
Round 4: ch 1, 2 sc in each sc around; join. (24 sc)
Round 5: same as Round 3. (24 sc)
Round 6: ch 1, *2 sc in next sc, sc in next sc* around; join. (36 sc)
Rounds 7-8: same as Round 3. (36 sc)
Round 9: ch 1, *2 sc in next sc, sc in each of next 2 sc* around; join. (48 sc)
Check gauge: 9 rounds = 2.75 inches
Round 10: ch 1, sc in each sc around; join. (48 sc)
Repeat Round 10 until sock measures
6.5 inches for sizes 5-6,
7 inches for sizes 7-8,
7.5 inches for sizes 9-10.
These measurements are approximate. For the best fit, try the unfinished sock on your foot to see if you need to add/remove a rounds or two.
Fasten off.
Heel flap:
Attach yarn into the 12th sc to the right from the joining. Work the heel flap with regular sc.
Row 1: ch 1, sc is same st where yarn was joined, sc in each of next 27 sc. (28 sc)
Rows 2-14: ch 1, turn, sc in each sc across. (28 sc)
Turn work inside out. Fold the edge of the heel together and stitch it together using sl st. Fasten off.
Attach yarn at the seam.
Round 1: in this round and in the following rounds once again we make sc grabbing yarn with hook over, continue working in end of rows of the heel flap, ch 1, sc each end of rows (14 sc), continue working sc of the sock, sc in each of next 20 sc, continue working one ends of rows of the heel flap, sc in each end of rows (14 sc), join. (48 sc)
Round 2: ch 1, *sc2-tog over next 2 sc, sc in each of next 2 sc* around; join. (36 st) If your feet are plumpy, you might want to make fewer (or not at all) decreases in this round.
Rounds 3-13: ch 1, sc in each st around; join. (36 sc).
Switch to hook size D.
Round 14: ch 3 (counts as 1st dc), dc in each sc around; join. (36 dc)
Round 15: pull up ch a bit higher, FPdc around ch-3 of the previous round, dc in next dc, *FPdc around next dc, dc in next dc* around; join. (18 FPdc, 18 dc)
Rounds 16-20: pull up ch a bit higher, FPdc around FPdc of the previous round, dc in next dc, *FPdc around next FPdc, dc in next dc* around join. Fasten off.
Selling my crochet patterns is the only way for me to support myself as an independent crochet designer. If you enjoy my free patterns, please consider buying a pattern from me! I do have a wide selection of patterns for baby items, home decor items, women's and children's accessories, etc.
Thank you, and happy crocheting!

My Etsy Shop

My Ravelry Shop